
A swamp cooler is not only an effective cooling medium at a very low price but also simple and easy to construct at home. If you want your room to stay cool with a healthy environment, then a DIY swamp cooler is your best choice.
Learn how to build a DIY swamp cooler and learn about the installation, operation, and protection of a DIY swamp cooler.
Diy Swamp Cooler:
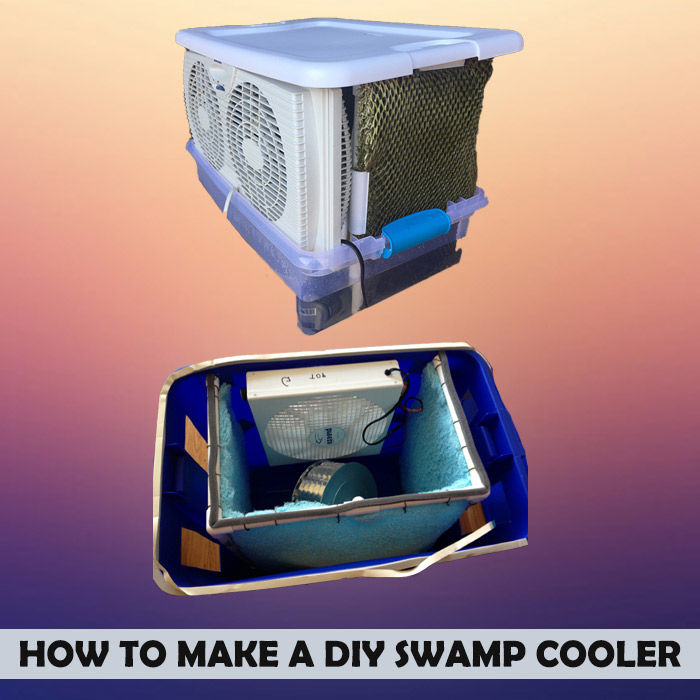
Like the simple swamp cooler, the DIY cooler also relies on simple evaporation methods to operate. A DIY swamp cooler is simple to make, but three essential ingredients are needed: water, hot air, and direct airflow.
For the swamp cooler, you will need ice or water, a body for the fan or water reservoir, and a piece of cloth to make the swamp cooler. There is about a five-gallon bucket with two holes and a lid you need for the swamp cooler. In this way, one hole absorbs fresh and warm air from the outside, and the other hole blows cool air into the room or house.
There will be a cloth that will act as a sort of filter. These pads absorb the water, and then after evaporation, the cooling occurs in the DJY cooler.
How To Make A DIY Swamp Cooler:
Generally, swamp coolers can be made very quickly, but there are some equipment requirements for them. You can find a step-by-step guide here, and you can make your swamp cooler with ease after you follow it.
STEP ONE: GATHER TOOLS AND SUPPLIES
Making the DIY swamp cooler is easy once you gather all the equipment and tools that you need. Once you have everything you need for a DIY swamp cooler, then get started.
Here are the basic components you’ll need:
- A large container of about five-gallon or a bucket of plastic.
- Knife or razor and a drill machine
- Few adhesives like Glue, Heavy-duty tape, or caulking
- A small but high-efficiency fan
- Ice or cold water
- Cloth or small towel made by the breathable material
STEP TWO: PREPARE THE COOLER’S BODY
Cooler bodies are typically made with a technical process since their largest and most significant parts are the cooler’s largest. First, you have to remove the lid and put it inside. It would help decide how many holes you will require and what size holes you will need.
Using a screwdriver, knife or dill, carefully make the holes. It depends on the type of material we are using.
STEP THREE: ATTACH THE FAN TO THE LID OF THE COOLER
It is crucial to create the right size of the hole between the containers so that the fan can fit properly and maintain the cooling quality. This will enable the cooler to work correctly. If you don’t do this properly, your cooler will be noisy.
Fitting the cooler requires the use of adhesives like glue or tape. Applying the adhesive needs to be allowed to dry before proceeding.
STEP FOUR: COMBINE ALL THE COMPONENTES AND GIVE IT A TRY
Everything should be checked here to make sure it fits properly in the holes. You should replace anything lost in the unit and arrange them correctly if they are crooked and misaligned. If the unit has loose parts, the system balance won’t be good, and the cooler won’t perform correctly.
Plugin the switch after you have made sure everything fits and check if the fan is operating properly. You should ensure that the system’s balance is good and the fan is functioning correctly.
STEP FIVE: FIT THE WATER PUMP
In order to get the water from the reservoir to the pads, we need a pump to push the water from the bottom of the container to the pads. This requires a small motor that is connected to pipes from the motor to pads.
[rank_math_rich_snippet id=”s-b7ca1668-b6fb-44c1-a534-e17bc311de81″]
STEP SIX: ADD WATER PAD OR FILTER
When the motor and fan are installed in the cooler, you should cover the holes of the container with a towel or a sheet of foam. The cloth or foam will act as a pad to absorb the water. The cooler will work more efficiently if the water is well absorbed.
If you want your cooler to stay cold, you need to use a form or good material for the pads to absorb the maximum amount of water and work efficiently.
STEP SEVEN: ADD WATER AND ICE AND PUT THEM TO GOOD USE
If you cover the system holes with cloth or foam, fill it with cold water or ice. Your cooler will function better if the water is cold. Your cooler will work very well if the pads are saturated since they can absorb more water. If there is also more water in the pads, it will work even better.
Your hard work is now rewarded. Relax and cool off.
HOW TO MAKE YOUR DIY SWAMP COOLER COLDER
If you make the swamp cooler yourself, you can easily keep it cold. It’s easy to build a DIY swamp cooler, so you don’t have to worry about maintaining it or cooling it. Keep your swamp cooler cold with these tips.
USE EXTREMELY COLD WATER
The first tip is very simple and easy. The cooler container can be filled with cold water. A cooler that is filled with cold water will operate more efficiently.
REPLACE ICE OFTEN
To keep your DIY swamp cooler cool, you should be sure to replace the ice cubes in its container. Instead of water, the cooler container can be filled with ice cubes or crushed ice. Two dozen ice cubes are more than enough for a swamp cooler.
KEEP THE LIGHT OFF
Another easy way to cool your swamp cooler is to place it in an area with no direct sunlight. You can also use the DIY swamp cooler in the shade. Swamp coolers operate best in the absence of light.
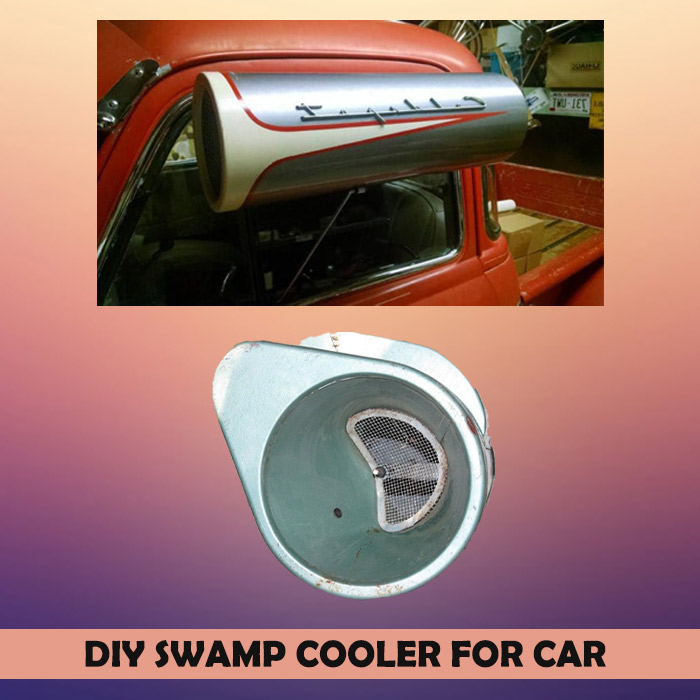
Diy Swamp Cooler For Car:
A DIY swamp cooler for your car is very simple to make. You only need a USB port for that, and you have an efficient DIY swamp cooler for your car. The DIY swamp cooler for cars is also relatively easy to use, just like the simple DIY swamp cooler. It just requires water, plugging in, and enjoying the relaxed atmosphere.
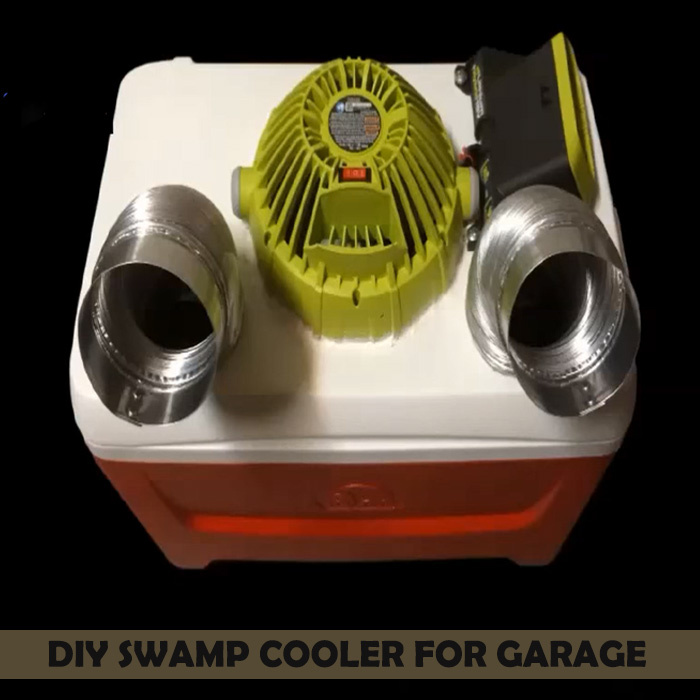
Diy Swamp Cooler For Garage:
A swamp cooler, which is also called an evaporative cooler, is an eco-friendly way to cool your garage inside or outside quickly. These can be used commercially and privately but work best in a hot, dry environment and are especially useful in large spaces like garages and warehouses.
When it’s very dry and hot where you live, you can make a swamp cooler to help keep your garage cool. Swamp coolers use a bucket of chilled water and a fan to cool the water evaporatively. Air passing over the bucket will cool and become humid. The water will be more effective if it has ice in it. Making ice in your garage shouldn’t be done in a freezer.
Diy Swamp Cooler Fan:
You can select the fan for the swamp cooler according to your requirements. Many types of fans are available in the market for making the DIY swamp cooler or homemade swamp cooler. When you buy the fan for a swamp cooler, keep in mind you have the exact measurement of the container or body of the cooler.
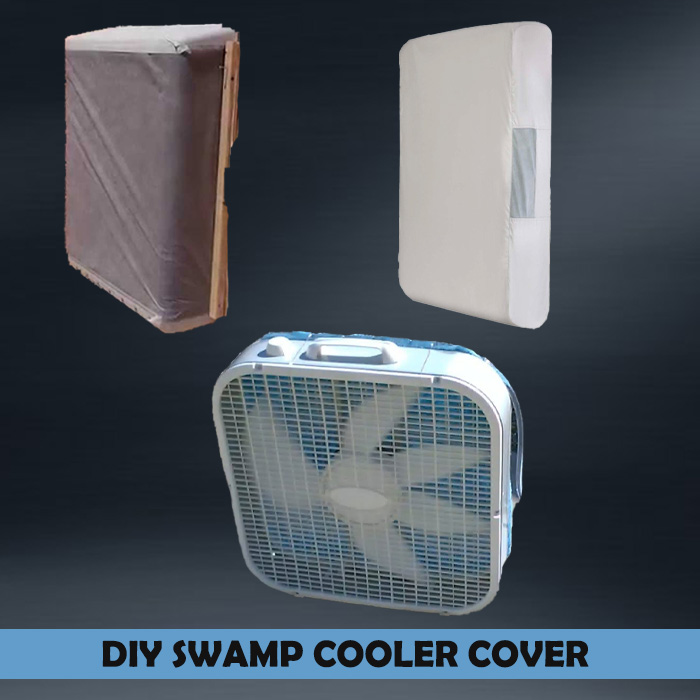
Diy Swamp Cooler Cover:
A DIY swamp cooler is a homemade cooler, and you have different options for their cover. You can use a container of plastic or a cover made from fiber.
Diy Rv Swamp Cooler:
For cooling, swamp coolers provide several options that you can use both domestically and commercially. It is possible to store medicine and food in cooled vehicles while traveling for a long distance.
You should use a DIY RV swamp cooler if you are going to move medicine or other food items that may decompose if they remain in a hot place. While moving from one city to another, you can quickly build a DIY RV swamp cooler and store your items.
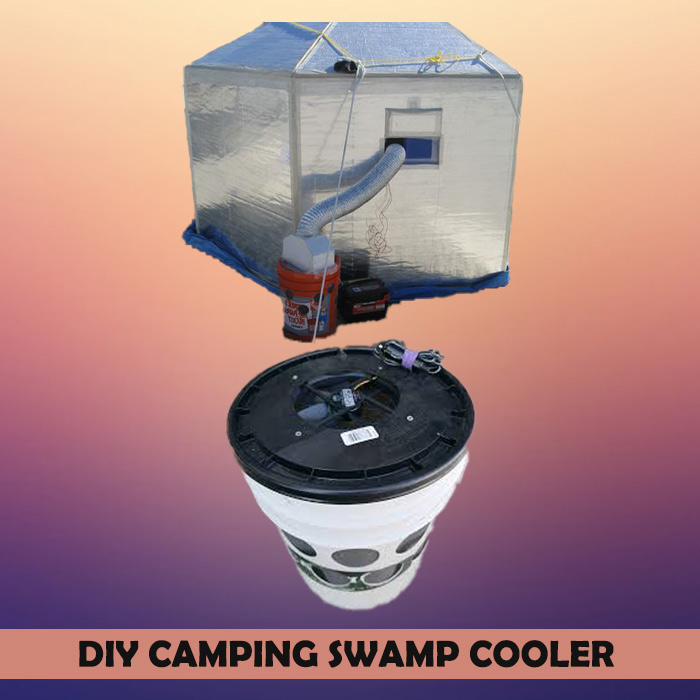
Diy Camping Swamp Cooler:
You can make a DIY swamp cooler even if you are on vacation or are living in a tent because swamp coolers give you multiple options. A simple fan, a motor, and water are all you need. It is not difficult to build a swamp cooler on your own.
How To Stay Cool While Camping In A Tent:
In hot weather, you would like to stay cool when you are in a tent. The swamp cooler is an inexpensive, easy way to keep your tent cool. You can follow this guide if you’re building a swamp cooler at your camp.
- It would be best if you made your tent in the shade.
- Make sure there is a good flow of air
- Get portable fan
- Get the container for the water reservoir
- Assemble all the parts of the cooler
- Disassemble the tent in the day
Conclusion:
It is the best option for someone to make his swamp cooler if he wants to make inexpensive cooling devices for his home. The Day swamp cooler is relatively simple to construct. Those interested in DIY swamp cooler can see all the information they need in the above article.
In the case of swamp coolers, there is no limitation on where you can use them because you can use them in the garage, room, hall, or even in your vehicle.